The trunk lid that came on the car was kinda beat up, but at the time I didn’t think it would be a problem. I’ve put a lot of effort into it, which at this point, I feel like is possibly a waste of time, as I should have used a better one to start with.
The first way I went wrong was in removing all the insulation padding that was sandwiched between the outer skin and the inner structure. This stuff was torn up and looked ugly, so I pulled it out… even taking the time to fish the stuff out from behind the bracing were you can’t see it. It was flopping around in there anyhow, so it had to come out. This took a fair amount of effort! Problem was, little did I know at the time… this stuff actually helps hold the outer skin of the trunk lid ridged, so it doesn’t flex so easily when you push on it. Oops!
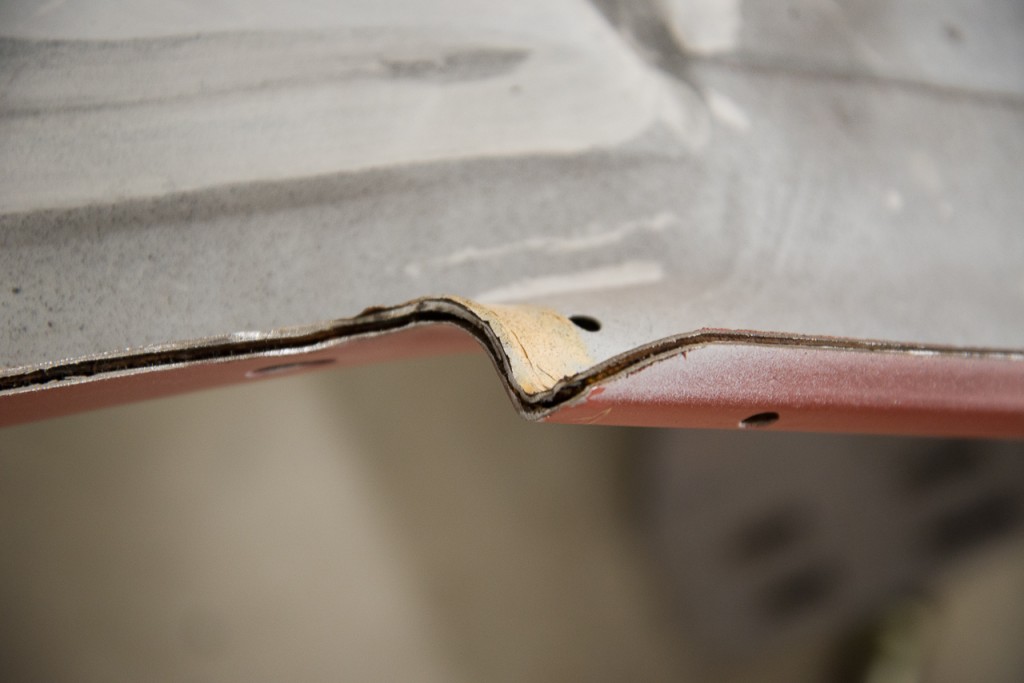
The second way I went wrong…. really wrong, was with attempting to repair an “oil can” effect on the outter skin, near the front right corner. I tried to heat-shrink it out with the shrinking tip on my Unispotter. OOPS big time. I basically effed it up! Then trying to fix it, I just made it even worse. Basically, I ruined the whole thing. And damn if I didn’t sell the one spare that I had, several years ago!
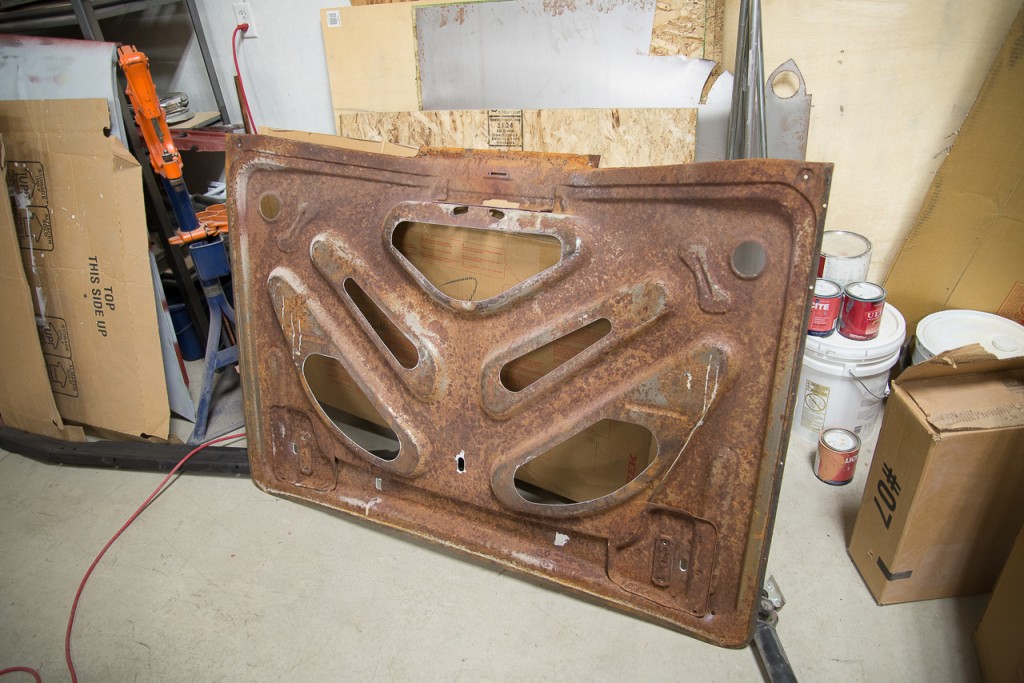
With nothing to lose at this point other than my time, I decided to remove the outter skin from the inner structure. I have heard of this being done before, and figured I’d give it a try. First, it would allow me access to the back side of the sheet metal skin, so I could possibly fix the warp damage that I had caused. Second, I could inspect for any hidden rust and treat it properly. Third, I could install a new insulation pad, solving the problems I caused when I removed the original… provided that I can even find a suitable replacement.
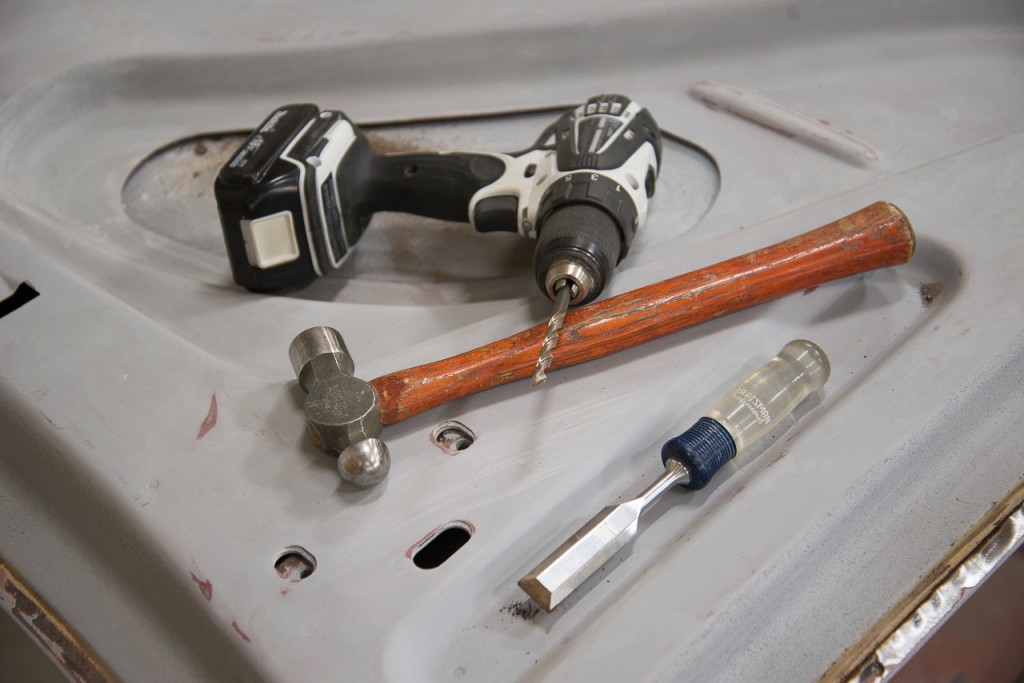
Removal of the skin took about 2 hours of work using a drill to drill out the spot welds on the inner edge where the skin is folded over the inner structure, and a grinding disc to remove the edge of the skin where I wasn’t going to have access to peel it back (I’ll have to weld it in these areas). I used a chisel and hammer to peel the edge of the skin back, which looks kinda ugly but it’ll flatten right back out with the hammer and dolly easily. I did ruin my chisel though… chipped both corners of it off before I got don’t… oh’well it’s a Craftsman, I’ll turn it in for a free replacement with the lifetime warranty!
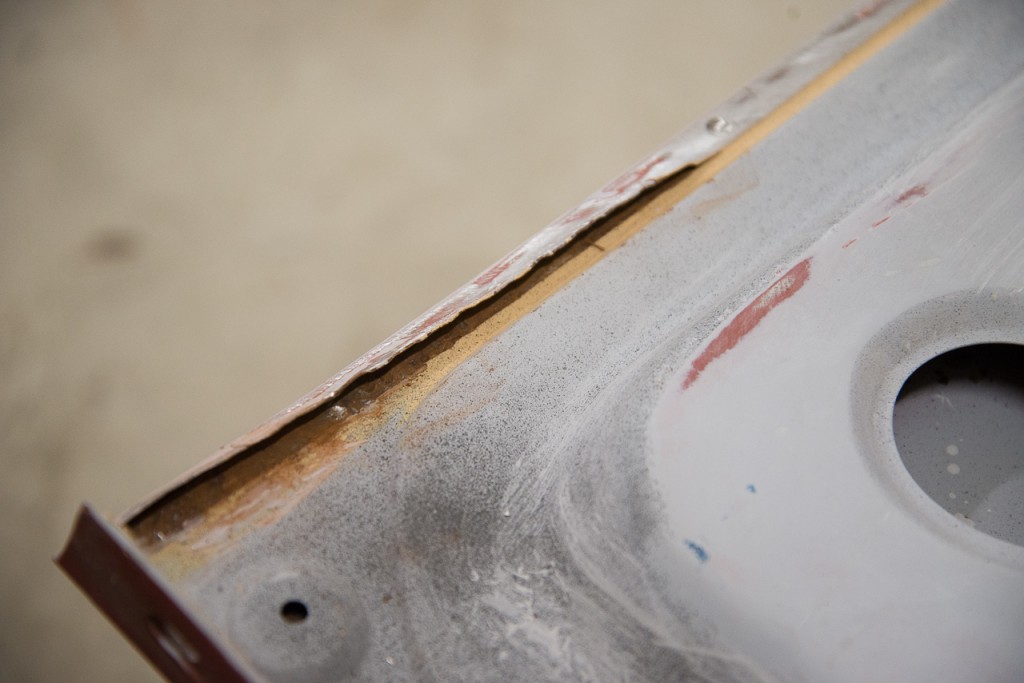
Once I had the edges peeled back and the rear portion of the skin ground away, I gently pried it off with the chisel. Easy breezy! Easier than I thought it would be, actually.
The inside of the support structure is in good shape, with surface rust but no bad rust to speak of, except a couple of tiny spots were I welded up some pinholes before at the rear edge. I’ll wire-wheel this clean and treat it with Picklex-20 before putting it back together. That is, if I am able to successfully straighten out the skin.
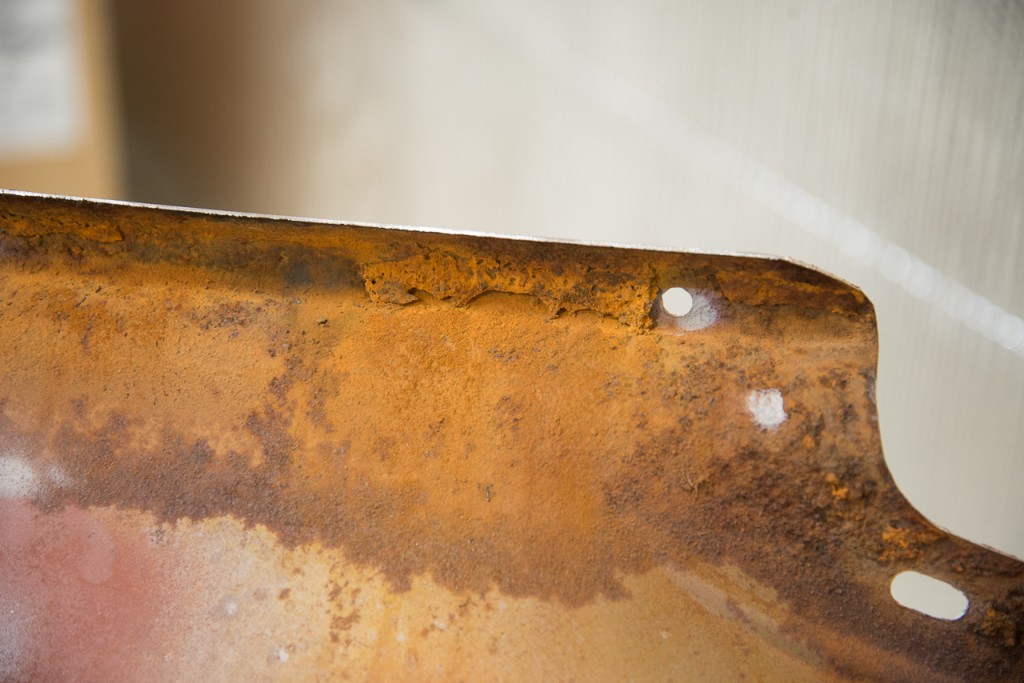
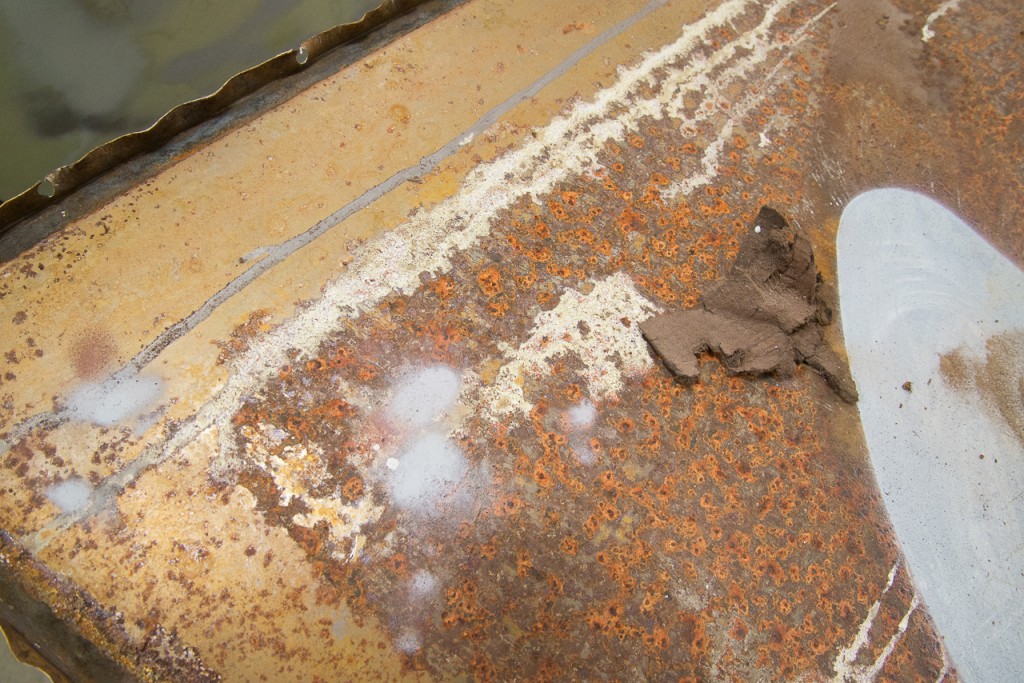
The inside of the skin actually shows a lot more rust pitting than I expected. Anywhere that the original insulation padding was, has rust. Some of the pits are pretty deep, maybe even deep enough to poke through without much effort. Interestingly, the areas along the edges were it had no primer, no insulation, nothing… just bare metal, its in excellent shape with only a very light coating of surface rust. It’s still actually mostly bare silvery colored metal! Amazing! The runs you see in the pic are from the Picklex-20 I had applied years ago when I was working on the bottom of this lid, neutralizing some rust. Of course, the gray patches were what was showing through the big holes on the inner structure. All the debris is what was hiding in there, waiting to pop out one day! Yuk!
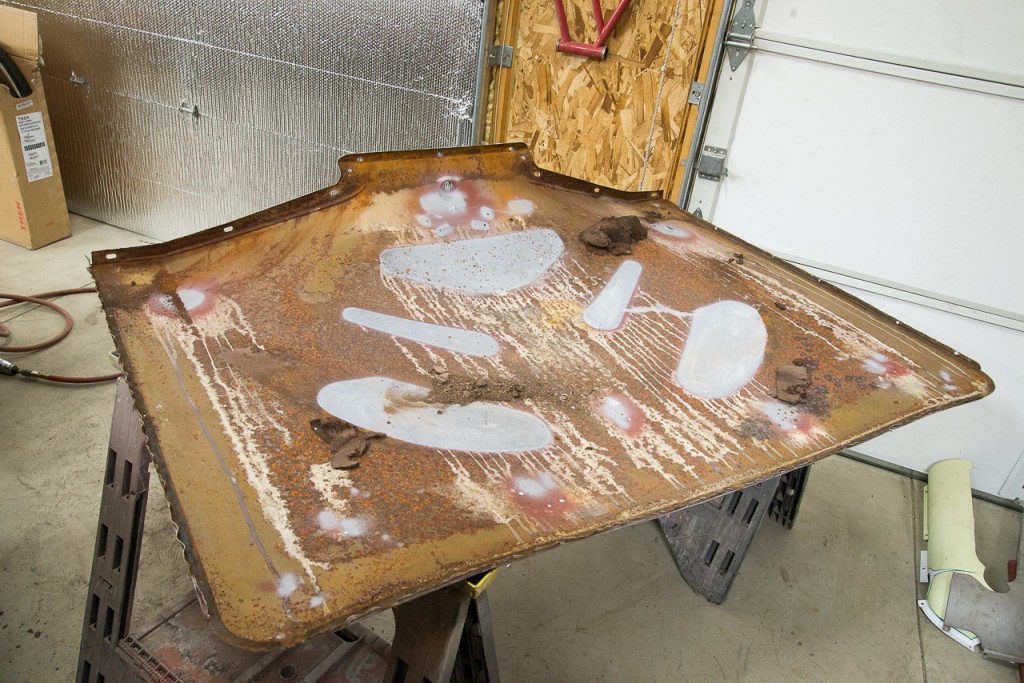
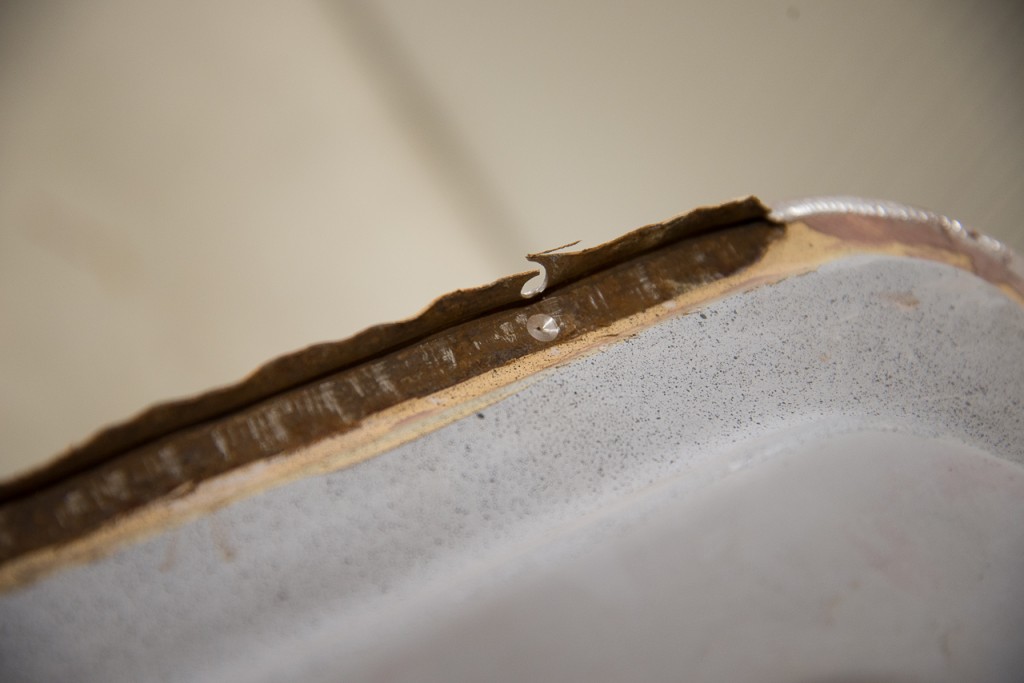
The rear portion of the skin shows a lot of rusty dusty buildup. Nasty stuff, waiting to cause problems in the future! This goes to show ya… even the nicest restoration on an old car probably has this sort of nasty stuff hiding in places you can’t reach, unless you go to extreme lengths, like removing the skin from the structure! Lesson maybe?